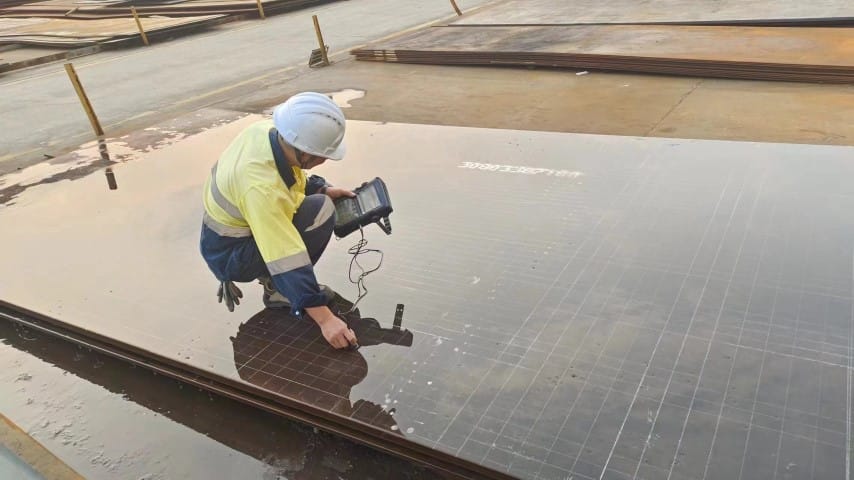
Steel plate base material (raw material) inspection is a crucial step in ensuring the quality and performance of steel products. This process involves a range of inspection methods, each with its own reference standards and key considerations. In this article, we will explore the advantages of steel plate base material (raw material) inspection, focusing specifically on the Q355B grade, and discussing various inspection techniques and their associated standards.
Visual Inspection
Firstly, let’s consider the visual inspection method. This involves a thorough examination of the steel plate’s surface for any visible defects or irregularities. Visual inspection is a quick and cost-effective way to identify potential issues, such as cracks, scratches, or discoloration. While it may not provide quantitative data, it serves as a valuable initial screening tool.
Mechanical Testing
Mechanical testing is another important aspect of steel plate base material (raw material) inspection. Tensile testing, for instance, measures the material’s strength and ductility by applying a controlled force to a specimen and observing its response. Impact testing, on the other hand, assesses the material’s toughness by simulating a sudden blow or collision. These tests provide quantitative data that helps determine the steel plate’s suitability for specific applications.
Chemical Analysis
Chemical analysis is also crucial in steel plate base material (raw material) inspection. This involves analyzing the material’s composition to ensure it meets the specified standards. Techniques such as spectroanalysis and wet chemistry methods are commonly used to determine the presence and concentrations of key elements. For Q355B steel, the chemical composition must fall within certain ranges to ensure its desired mechanical properties.
Non-Destructive Testing (NDT)
Among these methods, non-destructive testing (NDT) stands out as a crucial technique for assessing the integrity of steel plates, such as the Q355B grade.
NDT, as defined, refers to the examination of materials, components, or structures for discontinuities, inconsistencies, or other flaws without causing damage to the item being inspected. This technique is vital in the steel industry, allowing for the detection of internal defects, cracks, inclusions, and other imperfections without compromising the integrity of the steel plate.
One of the most commonly used NDT methods for steel plate base material inspection is ultrasonic testing. This technique employs high-frequency sound waves to penetrate the material and detect any discontinuities or defects. The reflected sound waves are then analyzed to determine the location, size, and nature of any flaws. Ultrasonic testing is highly sensitive and can detect even small defects, making it an ideal choice for Q355B steel plate inspection.
Another important NDT method is radiographic testing, also known as X-ray or gamma-ray testing. This technique uses ionizing radiation to penetrate the steel plate and produce an image of its internal structure. Defects or inconsistencies in the material can be identified by analyzing these images. Radiographic testing is particularly useful for detecting cracks, voids, and inclusions that may not be easily detected by other methods.
Magnetic particle inspection is another NDT method commonly used for steel plates. This technique involves magnetizing the material and applying a fine magnetic powder to its surface. Defects in the steel plate, such as cracks or inclusions, disrupt the magnetic field, causing the powder to adhere to the defect’s surface. This makes the defect visible and allows for its accurate detection and sizing.
In addition to these methods, there are other NDT techniques such as eddy current testing, liquid penetrant inspection, and acoustic emission testing that can be employed for steel plate base material inspection. Each of these methods has its own unique advantages and limitations, and their selection depends on the specific requirements and characteristics of the steel plate being inspected.
Standards
When performing these inspections, it is crucial to adhere to the appropriate reference standards. Standards such as ASTM, DIN, or EN provide guidelines for inspection procedures, equipment calibration, and data interpretation. Following these standards ensures the accuracy and reliability of the inspection results.
In addition to adhering to standards, it is also important to pay attention to certain key points during inspection. For example, proper sample selection is crucial to obtaining representative results. The sampling process should be randomized and take into account the plate’s thickness, width, and length. Furthermore, the inspection equipment must be properly maintained and calibrated to ensure accurate measurements.
Advantages
The advantages of steel plate base material (raw material) inspection are numerous. Firstly, it helps identify and eliminate defects or inconsistencies in the material, thereby improving the overall quality of the finished product. Secondly, inspection provides quantitative data that can be used to optimize production processes and improve material selection. Finally, it ensures that the steel plate meets the specified standards and is suitable for its intended application.
In conclusion, steel plate base material (raw material) inspection is a crucial step in ensuring the quality and performance of steel products. The use of various inspection methods, adherence to reference standards, and attention to key considerations during inspection can significantly enhance the reliability and safety of steel products, with Q355B steel serving as a prime example of the importance of this process.
