NDT Practice Ultrasonic Testing UT – Forging and Casting
1. NDT Casting
Because of the coarse grain size, poor sound permeability and low signal-to-noise ratio of the castings, it is difficult to detect the defects, to detect defects by reflecting off an internal surface or defect. NDT Forging Casting
The magnitude of the reflected sound energy is a function of the directivity and nature of the inner surface or defect and the acoustic impedance of such a reflector, it is therefore possible to detect the location of defects, wall thickness, or the depth of defects beneath the surface by using a variety of defects or acoustic energy reflected from the inner surface.
As a widely used non-destructive testing method, the main advantages of ultrasonic testing are: high sensitivity, which can detect small cracks.
Its main limitations are: it is difficult to interpret the reflected waveforms of disconnection defects with complex contour sizes and poor directivity;
Undesirable internal structures, such as grain size, microstructure, porosity, inclusion content, or fine dispersion, also hinder waveform interpretation; in addition, reference to standard test blocks is required.
2. NDT Forging

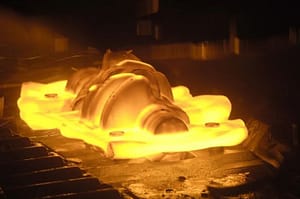
Forgings processing and common defects
The form of forgings are forging hot ingot.
The forging process includes heating, deformation and cooling.
Forging defects can divide into
- casting defects
- forging defects
- heat treatment defects.
Casting defects are: shrinkage cavity residual, porosity, inclusions, cracks and so on.
Forging defects are: folding, white spots, cracks and so on. Heat treatment defects are mainly cracks.
Shrinkage cavity residue is the shrinkage cavity in the ingot in forging the amount of cut less residual, mostly found in the end of the forging.
Porosity is the formation of the ingot during solidification and shrinkage of non-compact and holes, forging due to insufficient forging ratio and not fully dissolved, mainly in the Ingot Center and head.
The inclusions include internal inclusions, external non-metallic inclusions and metallic inclusions. The internal inclusions mainly concentrate in the center and head of the ingot. The cracks include casting crack, forging crack and heat treatment crack. The intergranular crack of austenitic steel axis is the crack caused by casting. Improper forging and heat treatment can cause cracks to form on the surface or in the heart of the forgings. The white spot is the forging high hydrogen content, after forging cooling too fast, the hydrogen dissolved in the steel does not have time to escape, resulting in excessive stress caused by cracking. The white spots are mainly concentrated in the center of large section of forgings. White spots always appear in groups in steel.
Overview of flaw detection method – NDT Forging Casting
The purpose of product inspection is to ensure product quality.
The purpose of in-service inspection is to monitor the defects that may occur or develop after operation, mainly fatigue cracks.
a. Inspection of shaft forgings
Most of the defects are oriented parallel to the axis. So, Drawing is the main shaft forgings production process.
Considering that the defects may have other distribution and orientation. So, the axial detection of shaft forgings should be supplemented with-
- straight probe axial detection
- oblique probe circumferential detection
- axial detection.
b. Flaw detection for forgings of cakes and bowls
Upsetting is the main forging process of cake and bowl forgings. And the distribution of defects is parallel to the end face.
c. Inspection of tube forgings
The forging process of cylinder forgings is upsetting, punching and rolling. Therefore, the orientation of defects is more complicated than that of defects in shaft forgings and cake forgings.
The worst quality part of the center ingot are removed during punching. Thus, the quality of barrel forgings is generally good. NDT Forging Casting
The main orientation of defects is parallel to the cylindrical surface, so the detection of cylindrical forgings is still based on the straight probe. HOWEVER, for thick-walled cylindrical forgings, it is necessary to add oblique probe detection.
3. Selection of Probe Conditions
Probe selection
Forgings generally fine grains, so you can choose a higher frequency of detection, commonly used 2.5-5.0 mhz. In order to avoid“Forest echo” and improve signal-to-noise ratio (Snr) , we should choose a lower frequency, generally 1.0 ~ 2.5 mhz, for the forgings with severe coarse grain attenuation.
Learn more our project quality managemet, QAQC and third party inspection (TPI), NDT practices thru below link.-
https://www.jsc-safe.com/category/supply-chain-logistics/
