The Principle and Characteristics of Ultrasonic Testing (UT)
1 Ultrasonic Testing can be used in quality control, raw material inspection, process improvement and other aspects, but also an indispensable means of equipment maintenance.
2 The main applications of ultrasonic testing are the detection of macro-defects in the workpiece and the measurement of material thickness. According to different characteristics, ultrasonic detection can be divided into many different methods:

2.1 Classification by principle:
Ultrasonic pulse reflection, Time of Flight Diffraction (TOFD) and so on.
2.2 Sort by display:
A-type display, ultrasonic imaging display (b, C, D, P scan imaging, dual-control array imaging, etc.) . The ultrasonic pulse reflection method with A-type display is one of the five conventional nondestructive testing techniques, the other four are Radiographic Testing: Radiographic Testing, Magnetic Particle Testing, Penetrant Testing, and Eddy Current Testing.
3 The principle of ultrasonic testing is essentially the use of ultrasonic and material interaction: reflection, refraction and diffraction.
3.1 What’s an ultrasound?
We can cause hearing of mechanical waves called sound waves, frequency between 20-20,000 Hz, and frequency higher than 20,000 Hz of mechanical waves called ultrasound, human can not hear ultrasound. For the detection of steel and other metal materials, we usually use the frequency of 0.5 ~ 10MHz ultrasonic. (1 mhz = 10 to the sixth Hz)
3.2 How Do I send and receive ultrasound?
The core element of ultrasonic probe is piezoelectric chip, which has piezoelectric effect: under the action of alternating tension and compression stress, the crystal can produce alternating electric field. When piezoelectric wafers are excited by high-frequency electrical pulses, piezoelectricity occur, converting electrical energy into acoustic (mechanical) energy, and the probe intermittently emits ultrasonic waves, or pulses, in a pulsed fashion. When the probe receives ultrasonic waves, a positive piezoelectric effect occurs, converting sound energy into electrical energy.
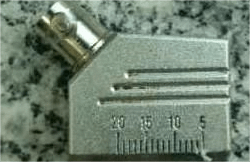
3.3 The conventional probes used in ultrasonic testing are generally composed of piezoelectric wafers, damping blocks, connectors, cables, protective films and enclosures, in the latter case, there is usually an oblique wedge that angles the wafer at the incident plane.
4 Type A displays the characteristics of the ultrasonic pulse reflection method.
4.1 Scope of application: applicable to metal, non-metal and composite materials and other products.
4.1.1 Detection of raw materials and parts: steel plate, steel forgings, aluminum and aluminum alloy plates, titanium and titanium alloy plates, composite plates, seamless steel tubes.
4.1.2 Butt welding joints detection: steel butt joints (including pedestal fillet welds, t-shaped welding joints, supports and structural components) , aluminum and aluminum alloy butt joints
5 Type A displays the advantages of the ultrasonic pulse reflection method
- Strong penetration ability, can be within a larger thickness of the workpiece internal defects detection. For metallic materials, thin-walled tubes and plates with a thickness of 1-2 mm can be detected, and steel forgings several meters long can be detected.
- Defect location is more accurate.
- The detection rate of area defects was high.
- High sensitivity, can detect the internal size of the workpiece is very small defects. The theoretical sensitivity of ultrasonic detection is about half of the wavelength of ultrasonic wave, and the sensitivity is about 0.65 mm when the detection object is steel parts and the ultrasonic oblique probe is used at the frequency of 2.5 mhz.
- The detection cost is low, the speed is fast, the equipment is portable, harmless to the human body and the environment, the scene use is more convenient.
6 Type A displays the limitations of the ultrasonic pulse reflection method
- The precise qualitative and quantitative analysis of the defects in the workpiece still needs further study.
- It is difficult to carry out ultrasonic inspection on the workpiece with complex shape or irregular shape.
- The location, orientation and shape of defects have some influence on the detection results.
- The material and grain size of the workpiece have great influence on the detection.
- The test result is not intuitive, and the test result has no direct witness record.
Learn more our project quality managemet, QAQC and third party inspection (TPI), NDT practices thru below link.-
